In the Listings tab, you can monitor and update your business data in the local SEO directories once you purchase a Semrush Local location.
Setting Up Your Location
Once you purchase a location, you can either connect your Google Business Profile (GBP) or set up the location manually. If you connect via GBP, both your brand name and business category will be automatically pulled from your GBP account. If you choose to set up the location manually, you will be asked to provide your brand name and business category.

Brand Name vs. Business Name
Please note that a brand name and a business name are not the same. A brand name helps you organize your locations in Semrush; it won’t affect how your listings look. We recommend using the same brand name across multiple locations of a single business.
Adding a brand name will help you manage multiple locations for the same business. For example, your businesses include Ikea Barcelona, Ikea Valencia, and Ikea Malaga; in this case, the brand Name will be Ikea. The brand name helps you navigate among your locations in Semrush.
Choosing Your Business Category
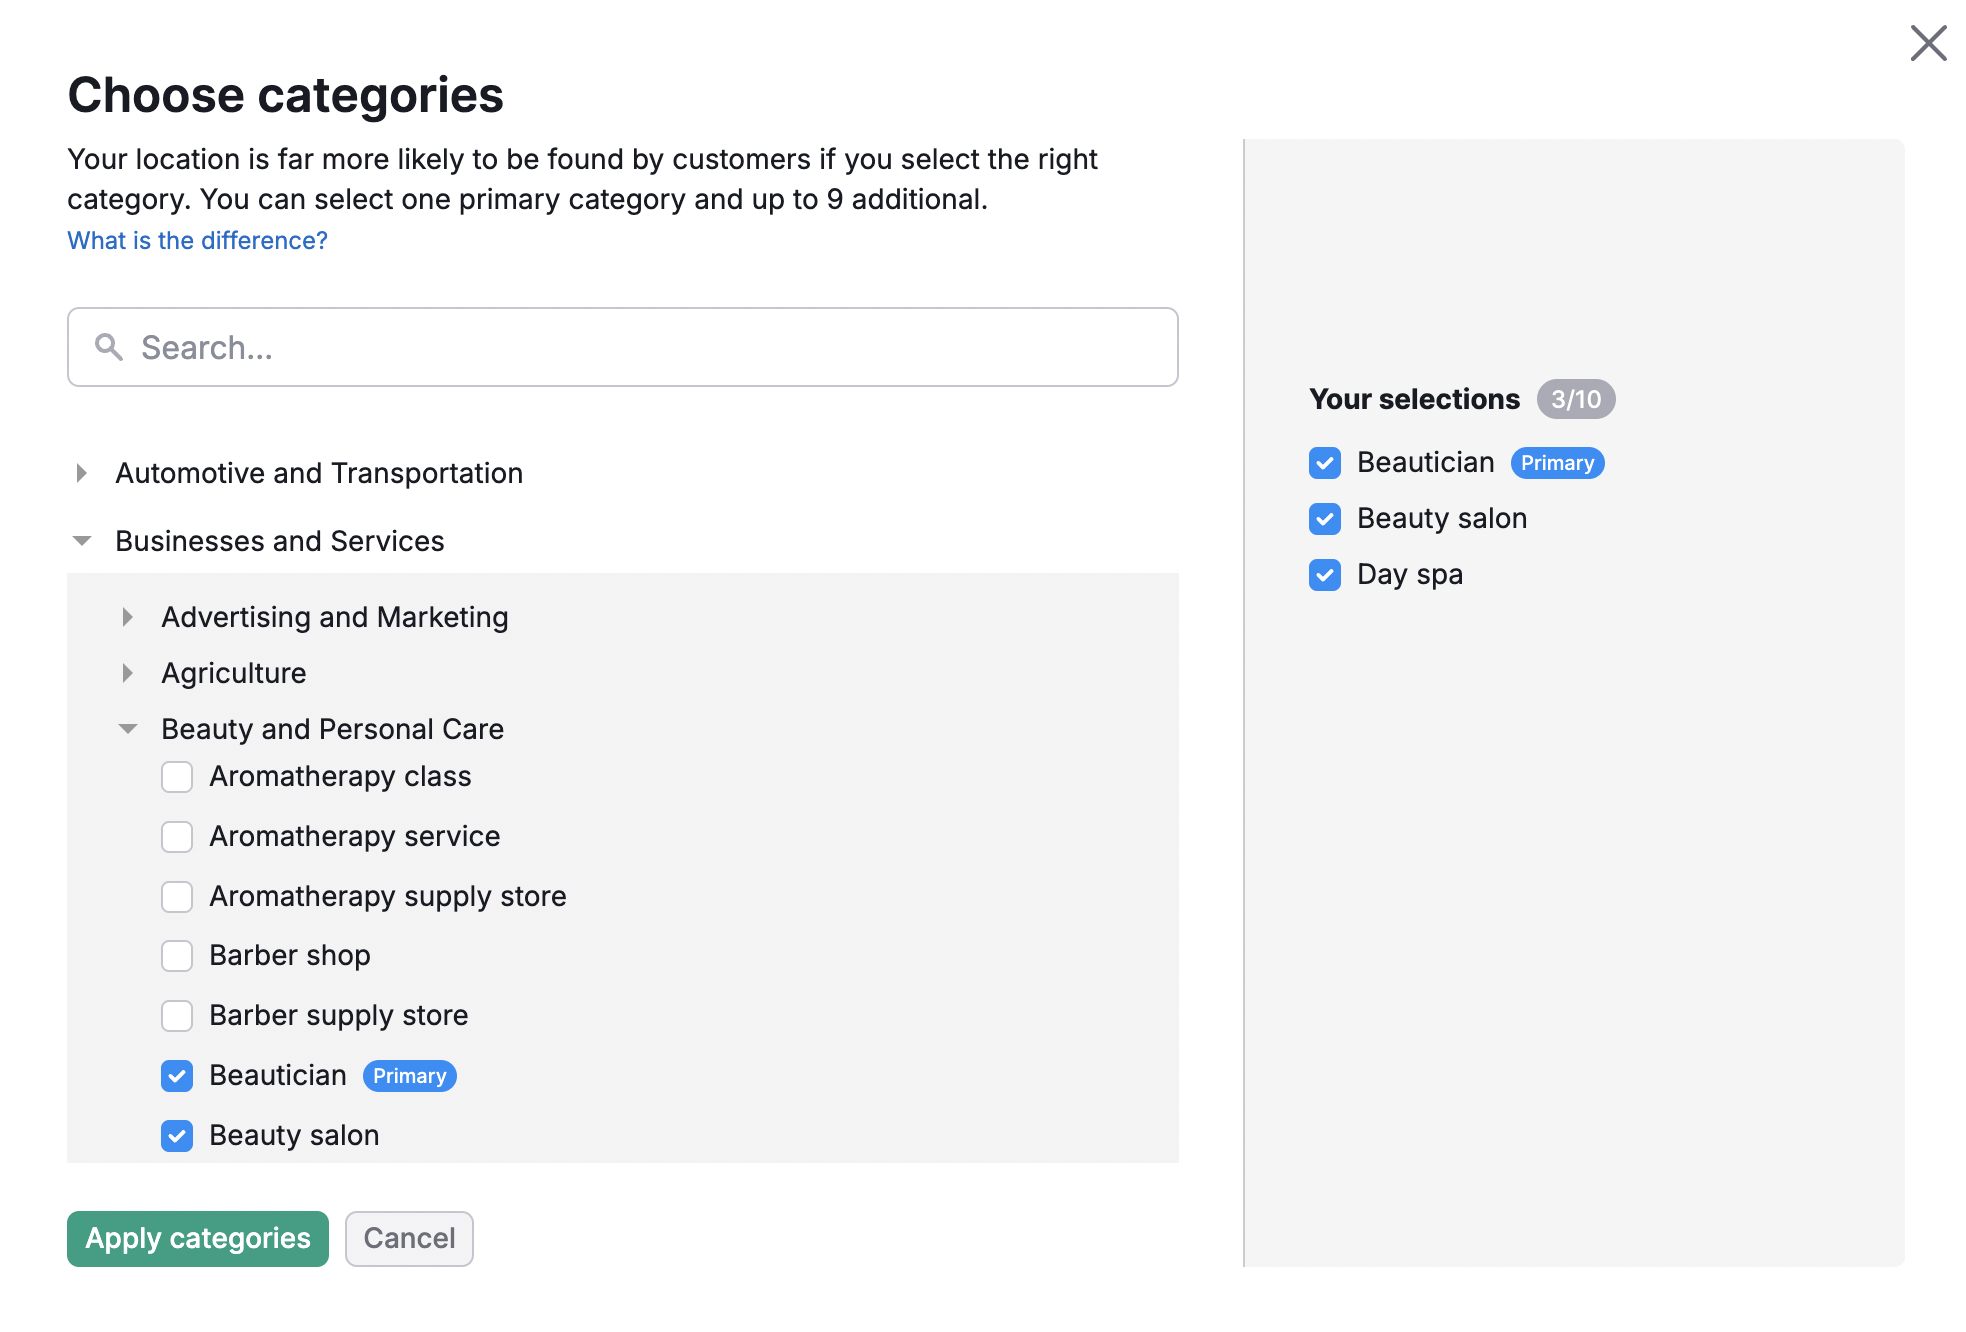
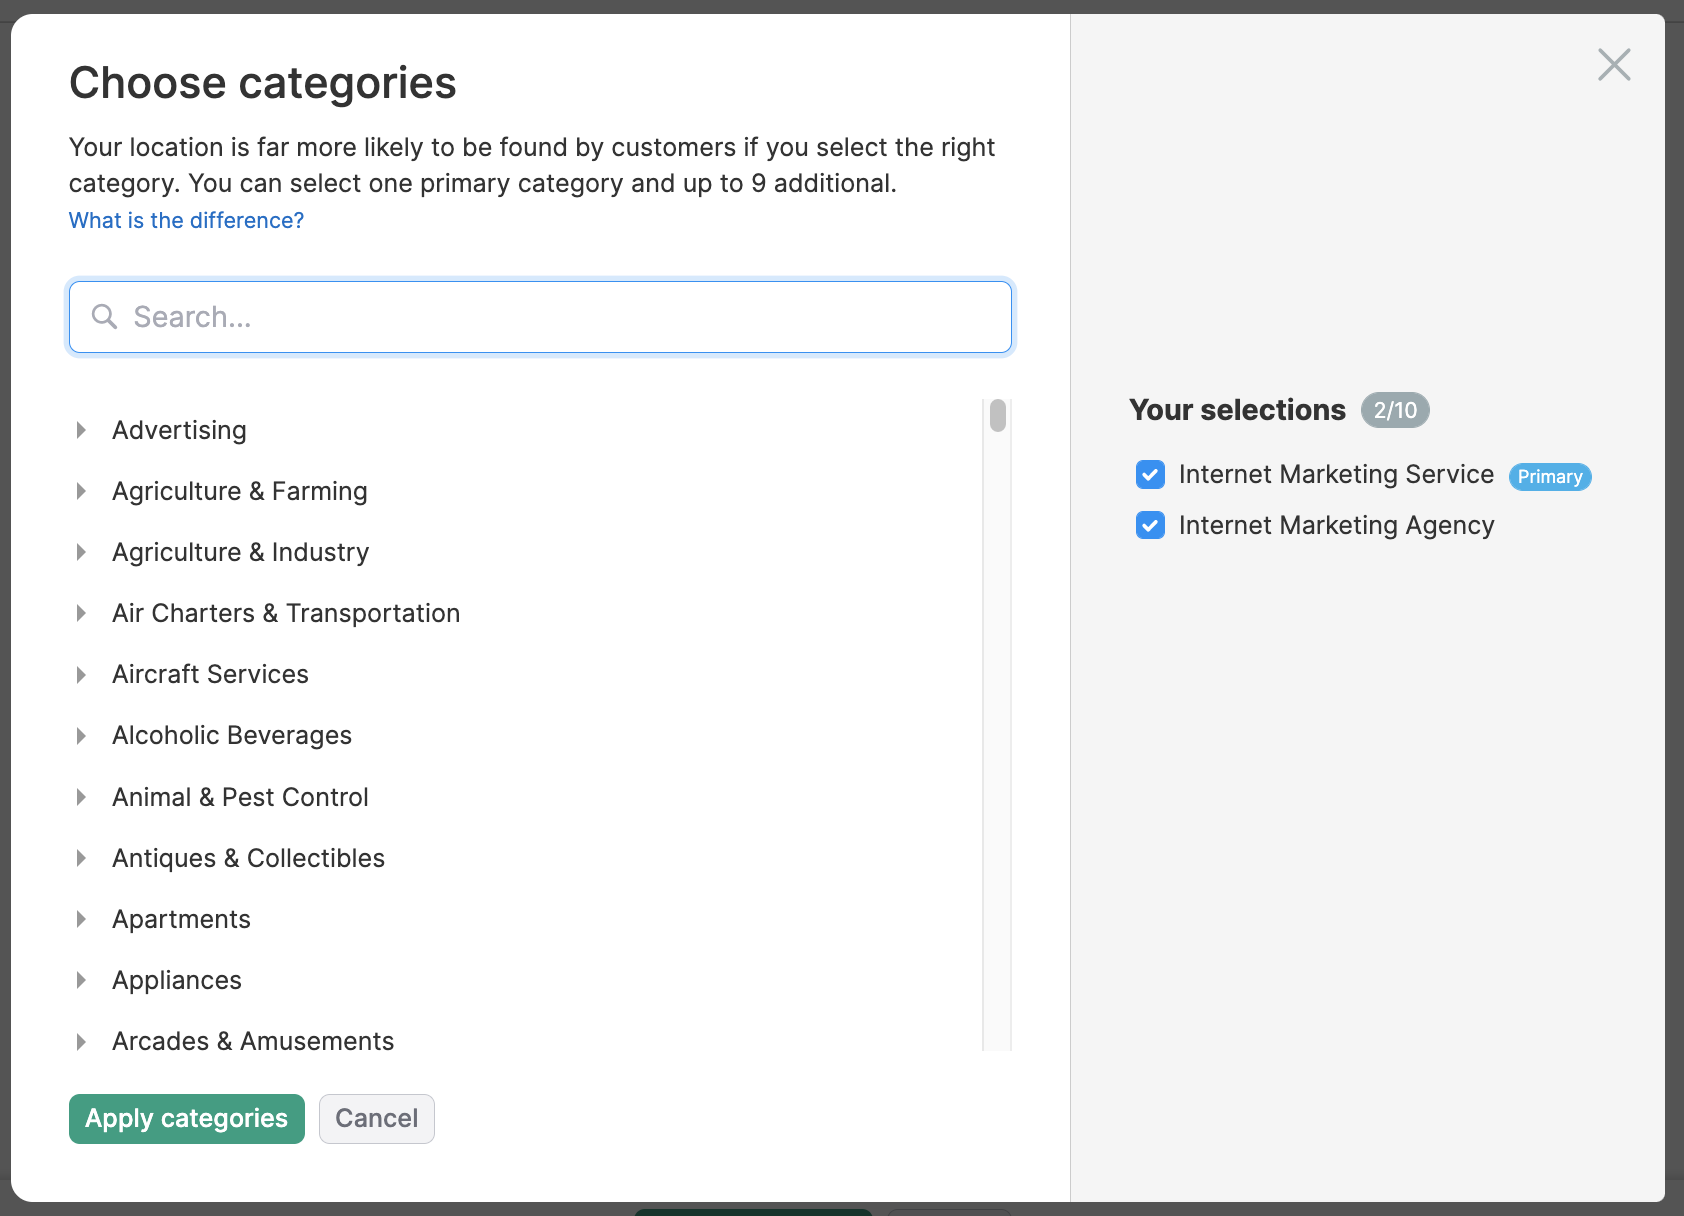
Select the business category from the drop-down that is the most relevant to your product or service. Pay attention to all the options; choosing the right category will help your customers find you. You can select one primary category and several secondary ones that can be soft-matching.
Please note that the categories you select during manual setup are used only inside Semrush and do not affect your Google Business Profile. After your location is accepted, you can connect your GBP. During the connection process, you will be able to choose a new category for your Google Business Profile.
Healthcare Directories
For businesses in the USA, Listing Management supports specialized healthcare directories (including DocSpot, WebMD, Wellness.com, and Vitals). To unlock these listings, your location must meet two specific requirements:
- Healthcare Category: You must select a healthcare-related category (e.g., Doctors, Dentists, Clinics) as your primary or secondary category.
- National Provider Identifier (NPI): You must provide your 10-digit NPI in the location settings. This identifier is required for both individual practitioners (Professional setup) and clinics or hospitals (Facility setup). Currently, a single location’s listing can have only one NPI.

Listing Statuses Explained
In the Listings tab, you will see a list of all your locations. If you click your location, you’ll open a location card.
It shows the total number of your business listings and lets you filter and view them by status.
- Connected – your business is present in the directory, and we have successfully linked the listing. No further action is needed. Note that if you have recently edited your location information, your changes might not have been applied yet.
- Submitted – your new listing or edit has been submitted to the directories via the publisher. Your data may already be there; we are just waiting for a final confirmation from the publisher. Often at this stage, a link to the listing will also be made available to you, allowing you to independently verify its business information. Submission-based publishers do not provide direct links to listings; this is just the nature of the publisher and how they process information. Find more details here.
- Processing – an edit or creation of the listing was requested.
- Disconnected - The list of directories that you’ve disconnected your location from by selecting Opt Out. You can always opt back in at any time with the Opt-in button.
- Unavailable – the directory with the listing does not respond at the moment, or the directory does not support that kind of business (e.g., Tripadvisor only accepts businesses in the Hospitality area). In some cases, you can make a difference. Follow the recommendations in the column Name / Address / Phone to make the listing active.
Note that healthcare directories will appear as Unavailable if the NPI is missing or the category is incorrect.
Check out this article to learn the differences between Dual Sync and Submission directory types.
Editing Location Information
If you want to edit the information for any of your locations, start by selecting the edit info button in the top-right corner.
Editing your information is broken down into 5 different categories. These include About, Contact, Placement, Hours, and More. On the right side of the screen, you’ll find additional settings options, such as managing photos and connecting external profiles.

Media & profiles section
This section on the right side of the page lets you manage your business visuals and connect external profiles to enhance your listings across supported directories.
Here, you can upload and manage:
- Your business logo
- A cover photo
- Business photos to showcase your location, services, or products
Uploading fresh photos regularly helps keep your listings up to date and can increase customer engagement. If you decide to add photos or videos, keep in mind it can take up to 24 hours for them to be distributed.
You can also connect external profiles to sync profile images and cover photos automatically:
- Facebook — connect your account to add a Facebook profile picture and cover photo
- Google Business Profile — connect your Google account to add a Google profile picture and cover photo
For eligible businesses, you can additionally connect healthcare directories to expand your visibility on specialized medical platforms.

About Section
In the About section, add your business name, brand name, categories, and description. Adding more information about your business will increase your relevance and traffic and help customers choose you.
You can update your Location information later; however, we advise you to change your Business name only if it has changed in your Google Business Profile, as it may harm your listings.

It's important to select the most relevant category for your product or service from the drop-down. Pay attention to all of the options, as choosing the right category will help your customers find you.
In addition to your primary category, you can add up to 9 supplemental categories (10 total categories). Not every directory will list your additional categories, but they can still help searchers find you. For this reason, make sure the primary category best represents your business.
Contact Section
The Contact tab allows you to manage your business’s contact details and social media links that appear across supported directories.
In this tab, you can add or update your phone number and website for Google directories, and choose to use the same information for other directories.
You can also manage your social media profiles, including:
- A YouTube video that represents your business
- Instagram and X (Twitter) usernames
Keeping your contact information accurate and consistent helps customers find and contact your business more easily across local directories.
Placement Section
Under Placement, you can edit all of the information for your company’s address. This includes editing where your location is pinned on a map. If you think your map marker isn't correct, you can edit that manually.
Here you can also hide your address within the listing. Reasons for hiding your address would be if you don’t actually have a brick-and-mortar for your customers to visit, if you operate a delivery service, or run a business out of your home address. Your listing with contact information will still show up for relevant searches, but the address will be hidden.
If you are a service-area business, you can specify your service delivery areas. This can be narrowed down to State/Region, County, City, Sublocality, or Postal Code. You can add up to 20 different areas for your service business.

Please note: Hiding your address is only applicable for selected websites.
Hours Section
The Hours section allows you to set and manage your business’s operating hours across supported directories.
In this tab, you can define your regular business hours for each day of the week, including options such as 24 hours or Closed. You can also quickly copy hours to multiple days to save time.
Additionally, you can set special hours for specific dates, such as holidays or temporary schedule changes, by adding custom dates and hours.
Keeping your business hours accurate helps customers know when your location is open and ensures consistency across directories.
More Section
In the More section, you can update the following:
A featured message with URL — a 50-character clickable message that appears in the listings. You can use it to highlight and promote special offers or services.
Payment methods — Here, you can specify what type of payment your business accepts. If you do not accept certain payment methods, it can cause significant inconvenience for your customers. So specifying available options beforehand is a good practice for keeping your customers happy.

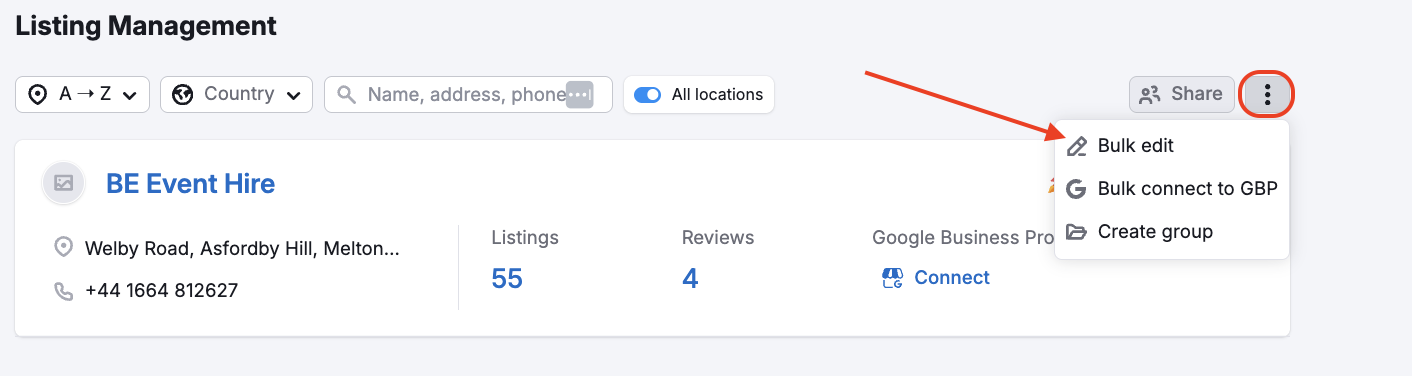
Managing Multiple Locations
If you have multiple locations, you can use the bulk edit feature to edit your listings at once.
Opting Out of Listings
Listing Management also lets you opt out of your listing if you don’t want your information on a specific site. One reason for this may be that you already have a good amount of unique content in a directory, and you don’t want the connection through Semrush to change what information you already have there. In this case, you can just choose to opt out, and we won’t push your location into that directory.
To do this, all you need to do is click the opt-out button within the action column.
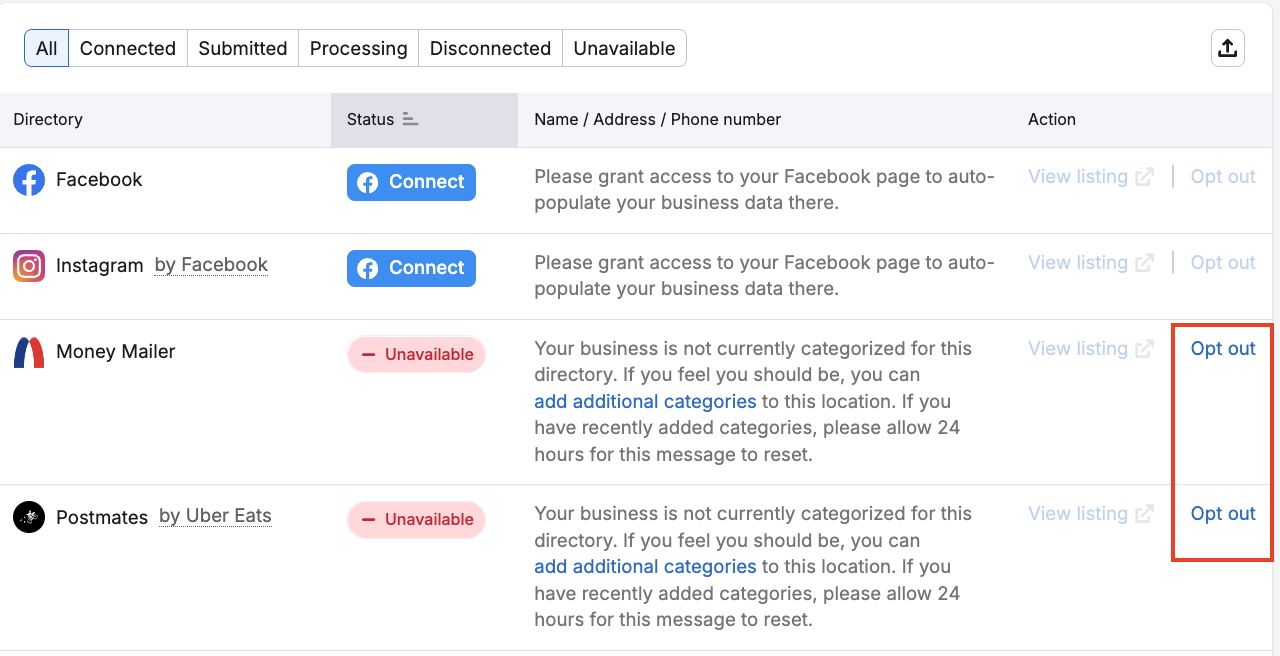
Don’t worry, you can always opt back in once you’ve disconnected the link. Just filter the report to Disconnected, find the directory you want to opt back into to and choose Opt-in.
Opting out of a directory with a parent directory
Please note: If you wish to opt out of a directory that has listings via a parent directory (for example, Instagram’s parent directory is Facebook), you will be opting out of both directories (so opting out of Instagram would also opt you out of Facebook).
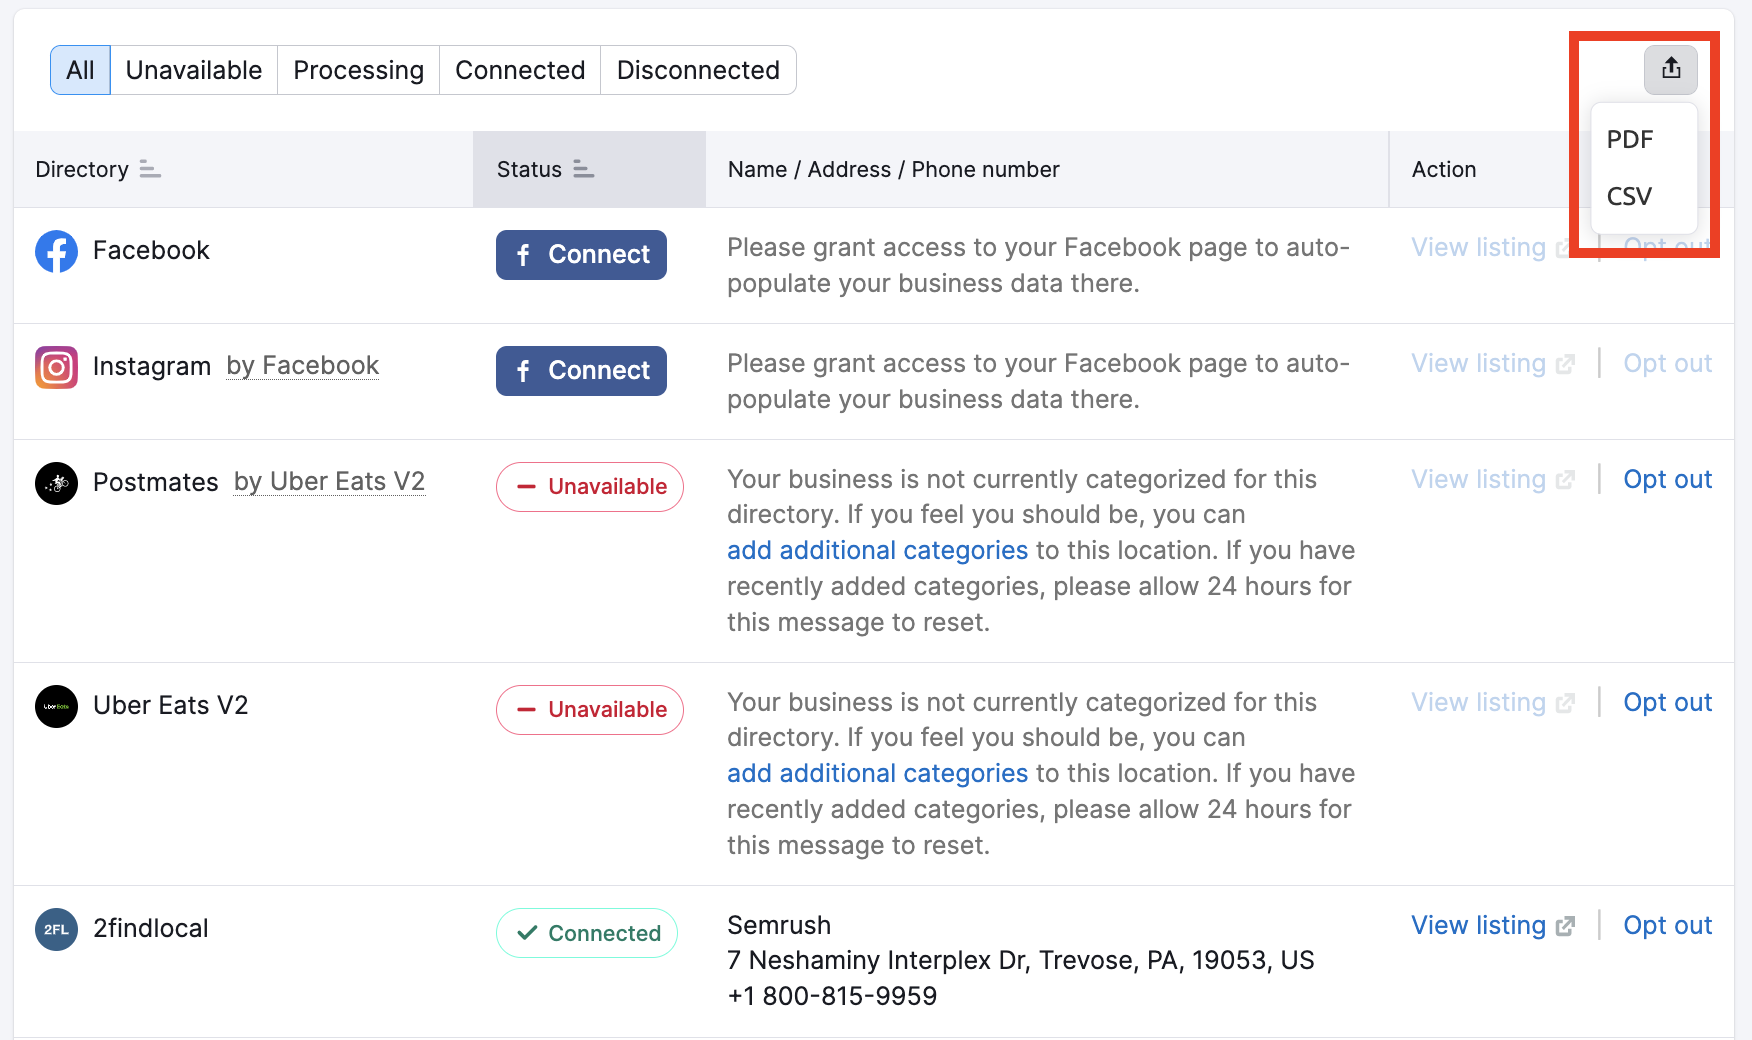
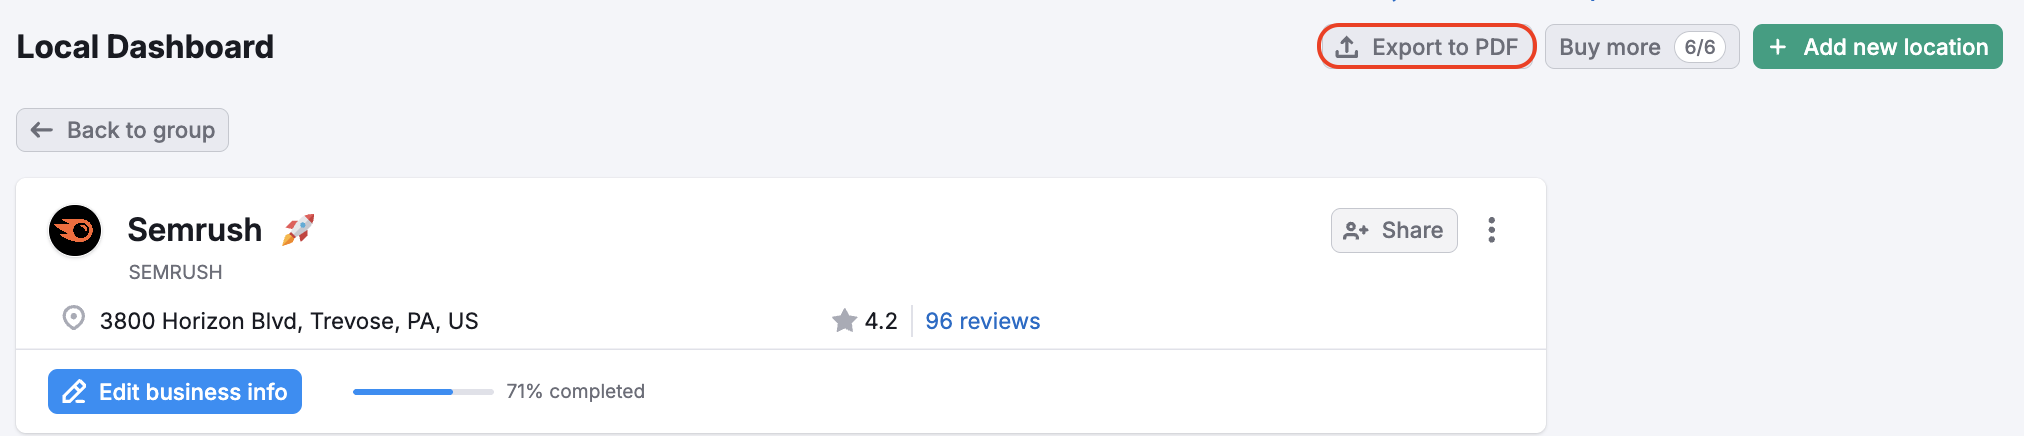
Exporting the results
Exporting to PDF
You can export the Listing Management results via the PDF button found at the top of the tool.
The Local Dashboard will export the Overview from Semrush Local, and the Listings report can export all Listing Details for the location, including Directory, Status, Name / Address / Phone, and URL.
When exporting to PDF, you’ll have the option to email, schedule, or brand your report (white-label). White Label and Branded Reports are available with Pro Reports.
On the Listings report page:

On the Local Dashboard:
Exporting to CSV
You can export all your location listings as a CSV file using the button above the table in the Listings tab. The file will contain all directories, your location’s status for each, name/address/phone data, and a direct link, if available.